Stripe Payments Guide
This service is named stripe and uses the Stripe platform for online payments.
Stripe is a leading technology company providing the technical, fraud prevention, and banking infrastructure required to operate on-line payment systems. Businesses of every size - from new startups to public companies - use Stripe to accept payments. Platform 6 offers this Stripe Payments service that allows Developers to include payment features in their P6 Applications.
Note
If you have the stripe=* permission, you can have access to all the functions mentioned below.
Stripe account
To be able to use Stripe and accept payments, a Stripe account is required. This can be done online: create a Stripe account.
Stripe Payments Dashboard on Platform 6
View the Dashboard
To access the Stripe Payments Dashboard, you need to have the stripe=view and stripe=read permissions.
Enter the Stripe API keys to register the account on the Portal. You can copy the API keys on your Stripe dashboard.
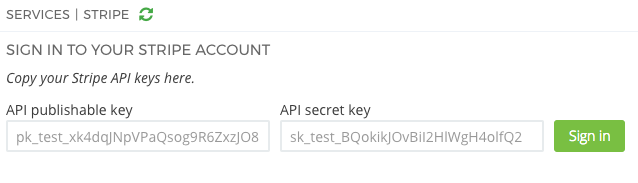
Note
You will no longer need the API keys again, unless the Stripe account is removed from the Portal.
After you have registered, you will see some of your account’s details, the bank accounts added and your customers’ list.
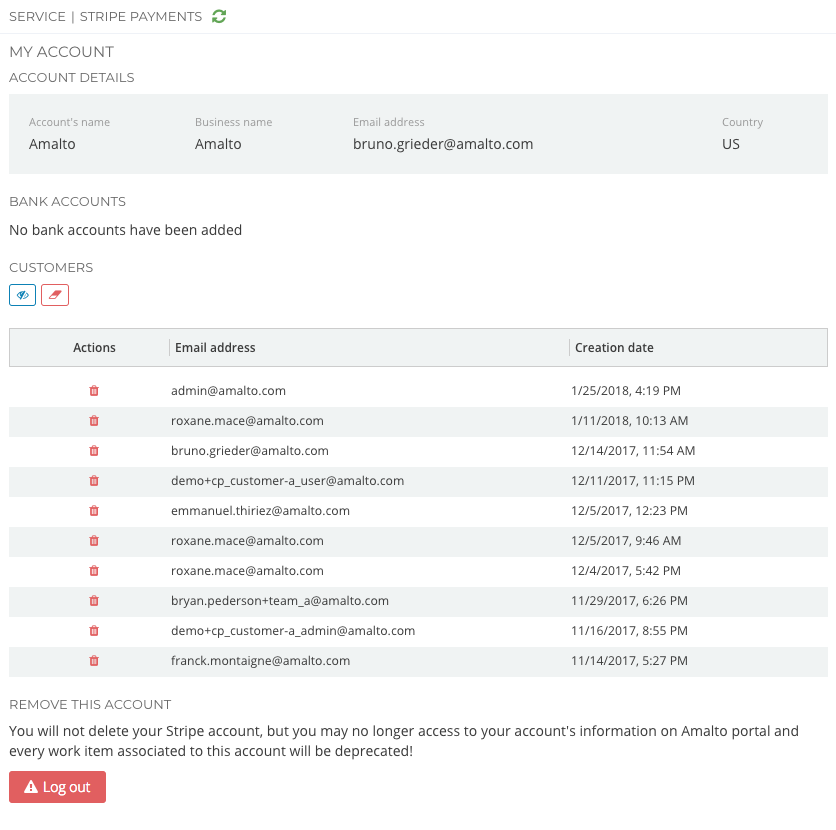
Edit the account
To edit your account, you need to have the stripe=* permission.
You can delete a customer’s account and remove the Stripe account from the Portal.
Implement online Payments on Platform 6
Implementing a Payment feature on a Platform 6 App will require the setup of a few service items.
The common scenario will be to have a Payment Request (in the form of a Work Item) to be created when a Transaction (for example an Invoice) is switched to a specific status (for example “To be paid”). So, it means there shall be a Route (defined thanks to the Routes service), that will trigger a Workflow Step when a Transaction in that specific status is routed, and a Script that will update some metadata elements of the transaction once payment has been performed.
!! warning The following section needs to be updated to take the new “Routes” service into account
Sample Payment workflow
Scripts to import
You need to import the following scripts:
- MessageInfo: this document contains all the details of the payment to process. The document type has to be an invoice and the status has to be To be paid. Here is an example Message Info.xml
- Routing rule: this script will process the MessageInfo and send it to the Workflow adapter (Routing Rule Invoice To Be Paid.b2b).
- Workflow step: this script describes the workflow system (Workflow Step Invoice To Be Paid.xml).
- Groovy script: this script will update the MessageInfo, once the payment is done (Update Invoice After Payment.b2b).
Permissions and assignment to the Organization structure
-
In order to receive the Payment work item, a user shall:
- have the permission defined in the Workflow Step, here
workflow=role('Invoice Payers') - be assigned to the Organization node set in the Workflow Step, here
/[current instance]
- have the permission defined in the Workflow Step, here
-
In order to be able to pay, the user shall have
stripe=paypermission
To change the Organisation path and/or the required Permission, edit the following line in the Workflow Step XML definition:
<Assignee name="Invoice payers" path="/[current instance]" type="UNIT" scope="workflow=role('Invoice Payers')">
Invoice payment
Once you have imported all the scripts and given the right permissions, reprocess an invoice. It will create a Work Item and you will see the payment form on clicking on the button Pay.

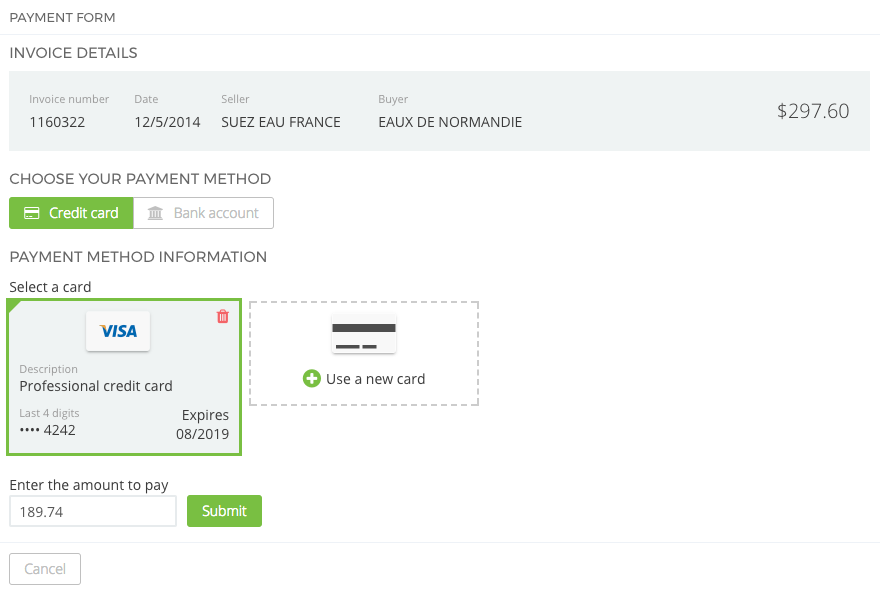
You’ll see the invoice’s details and you can choose to pay with a credit card or by ACH.
If there is a Loading error, when you open the form, that means that the Stripe API keys have not been entered in the service’s configuration. You need to fix this on the Stripe dashboard.
Credit card
The Payer can use a previously stored credit card or create a new one. Supported cards are VISA, MasterCard, AMEX, Discover, Diners Club and JCB. The Payer can choose to save a new entered card or not. If yes, the card will be added to the saved cards and be available the next time.
The Payer can then choose the amount to be paid (has to be equal or lower than the initial amount).
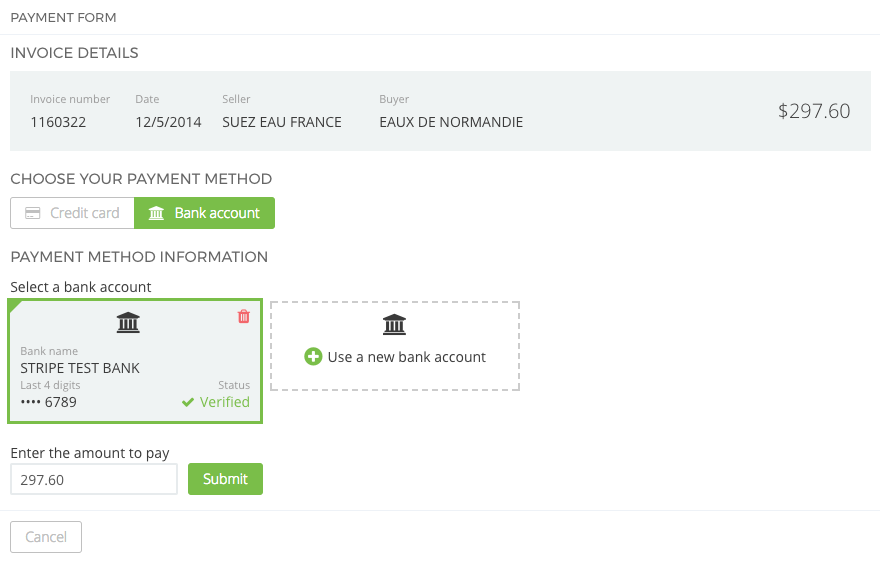
Automated Clearing House (ACH)
Warning
The Automated Clearing House payment method can only be used if the Stripe account’s owner has a US bank account!
The Payer can create a new bank account.
Once created, the bank account shall be verified - and verification has to be successful to proceed. If verification fails, the Payer shall contact his/her bank.
The Payer can then choose the amount to be paid (has to be equal or lower than the initial amount).
After the payment
Finally, the invoice is updated with the new status Paid.
The way the invoice is updated can be change in the WF_Update_Invoice_After_Payment script.