Manage Applications
To package a Platform 6 Application, you will have to use the applications service.
Permissions
To see the Applications menu entry on the Portal, you need to have the applications=view permission.
Managing Applications
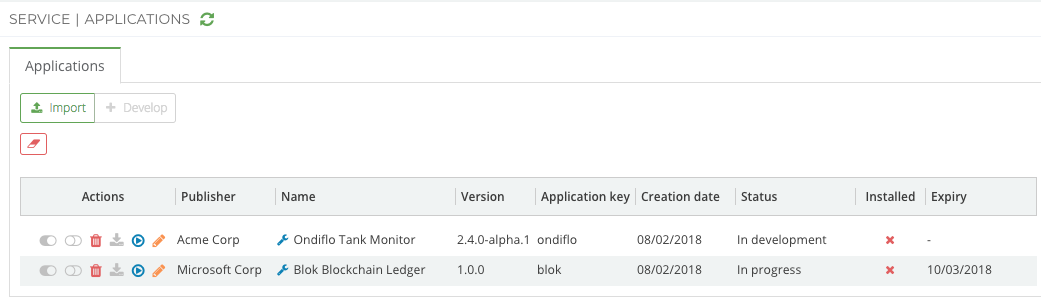
The list displayed by the Portal combines: . Applications that are being developed on your instance but have not yet been packaged (blue spanner icon) . Applications that that have been packaged and are ready to be distributed (blue “Download” icon in the “Actions” column) . Applications that have been installed on your instance (green check icon on the “Installed” column)
Packaging an Application
The list of Applications that can be packaged is restricted to the list of installed Application Publisher Profiles.
Clicking on the Develop button will create a new bundle from the application details and sign it using the key in the Application Publisher Profile. The newly created application bundle will be automatically added as a new Application row to the main list of applications allowing it to be downloaded and distributed to others.
Warning
If an Application already exists (same key and version), the Application Publisher will not be allowed to build.
New applications in development mode can be deleted.
Double-clicking on a row will give access to the Application build details form which allows an Application Publisher to define the content of the Application.
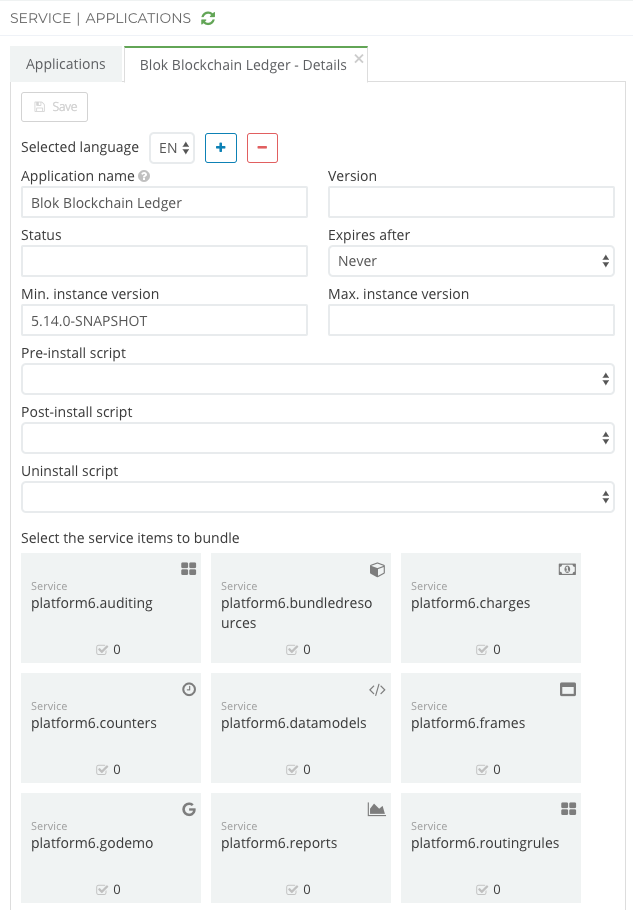
The user interface allows the Application Publisher to select each installed service and list the service items that have an application key that matches the application that is being built. The Application Publisher can select items from the list to include in his Application and also select the content-mode (none, read and edit) for each service item selected.
Tip
Please read the Manage Bundled Resources section to understand how to add Java archives in your Application.
The version and the status values can be entered. Please note that Platform 6 does not manage application’s versions and status messages. They are treated as simple strings only. However, they can be used to help application’s users control what is installed on their instances.
Warning
An application can’t be packaged over the top of one that already exists! Thus the combination of the application’s version and status must be unique.
Applications can optionally expire after a given period (trial versions for example). The expires after field specifies this behaviour.
Pre-Install, Post-Install and Uninstall scripts can be selected. The user interface will provide a list of scripts with matching application key to choose from.
Note
The Uninstall script is run BEFORE the items are un-deployed.
Finally, the application’s properties list enables a publisher to define values passed to each Install/Uninstall script. These properties are also be available at runtime to enable additional functionality.
For example, if the Application Publisher is distributing a custom service written in Java and conforming to Platform 6 ServiceComponent specification, they can add the service checksum as a property that can be validated by the Platform Manager at runtime.
Installing an Application
To install an Application, click on the Import button, select the Application .p6app file from the file system and upload it.
The upload process will verify the signature of the Application Publisher , and once the bundle is verified, install the Application.
Application installation unpacks all service configuration items and saves them. It also optionally runs script modules allowing for pre- and post- installation customisation.
Warning
Expired applications cannot be installed.
It is also possible to uninstall an Application.